Trust Fling
- Previous Map Catapult Intro
- File Name sp_a2_trust_fling
- Appearance The Cold Boot
- Native to Challenge Mode Yes
- World Record loading...
- Least Portals loading...
- Next Map Pit Flings
Contents
Overview
The general route for Trust Fling is fairly straightforward as a whole, but can be changed quite a bit depending on how comfortable you are with things like air strafing; small adjustments make the map much more consistent.
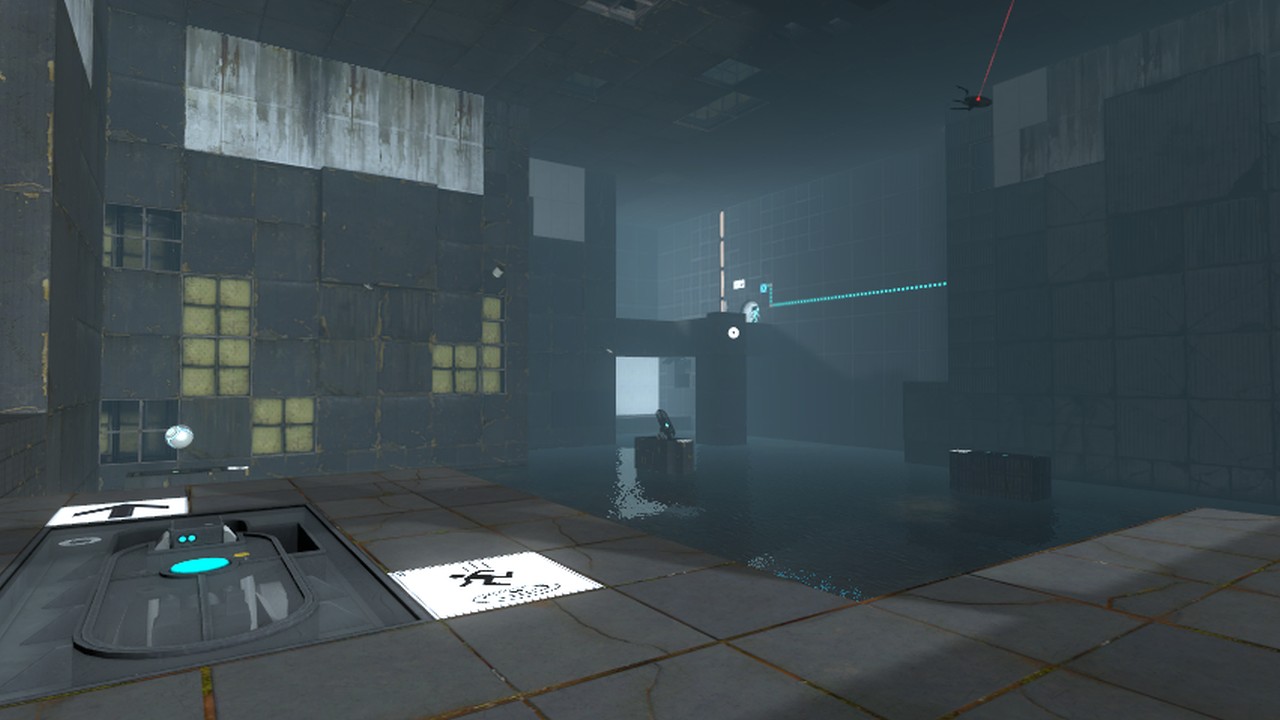
General Route
The general route for Trust Fling is to get to the second trigger in the gallery as quickly as possible. An elevator circle jump and stair hops is the fastest method, but depending on your experience with stair hops, it could be more beneficial to wall strafe up the stairs.
Strafing to the Button
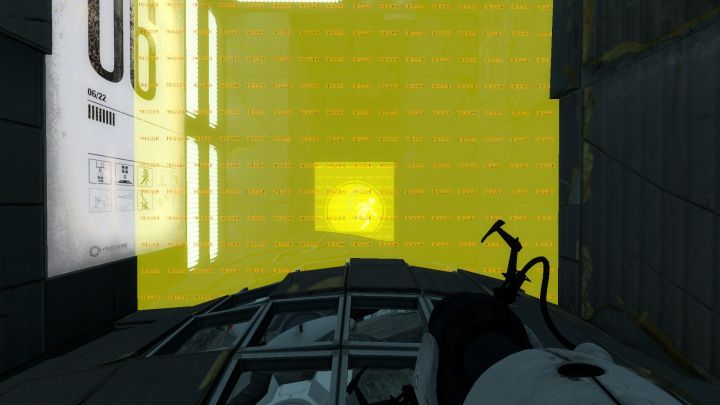
If you are confident in your air strafing abilities, shooting on the wall to the left of where the button is located from the door will be the quickest way to the button. The 4th image shows the correct horizontal position, but the vertical position depends on how confident you are in your strafe. The lower the portal, the faster you'll reach the bottom, and the more time you'll save at the cost of needing a better strafe.
Once you hop out to the catapults, ride them until you reach the slanted portalable surface (If you are fast enough to hit panels while going on the catapults, read this section about avoiding them). It is important to note that, depending on where on the third catapult you land, the way your character model will collide with this slanted surface will change. If you intend to strafe, you need to land in the center of the third catapult, or where the game brings you naturally, without strafing during the flings over. Being too far to the left or right will result in your character getting knocked upwards, either by a small, or large amount. This prevents you from strafing, so it is important to stay centered.
Once you hit the panel, you want to quickly place your other portal down, and strafe to the left fairly aggressively. From here, you can play it safe and two hop to the button or circle jump over the gap to hit it slightly quicker.
This first trigger will open the door.
This second trigger will start moving the panels blocking the door.

This third trigger initiates the falling of the panels from the ceiling.

This is the wall you want to shoot at if you plan to strafe. The farther down, the harder the strafe, but the more time-save.

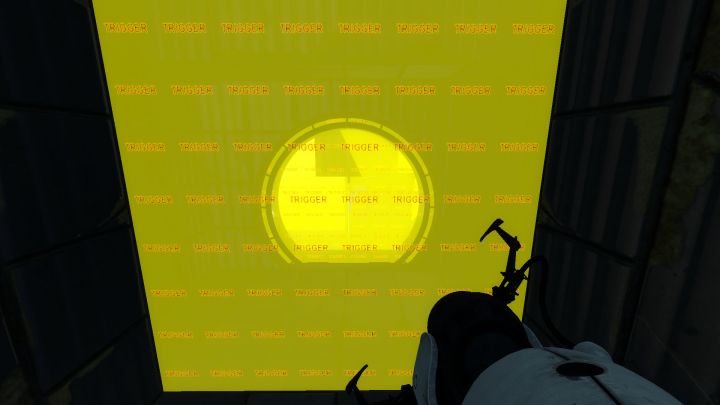
This is the wall you want to shoot at if you do not plan to strafe.


Safer Route (No Strafing)
If you do not have confidence in your air strafe (particularly in full game runs), then placing the portal on the very far back wall is the most effective way to get to the button. The 5th picture in the gallery shows a good location that is very low-effort. Placing it that high will have you hit extruding panels, and drop low to the ground. So placement here will allow you to fling straight through your portal at the end of the three catapults. From there portal to the top right, and again behind you and get to the button.
You can also place your portal lower, but you will need to make sure you hit the slanted portalable surface at the end of the catapults first, and lose your speed so you don't fling off into the goo.
General Ending

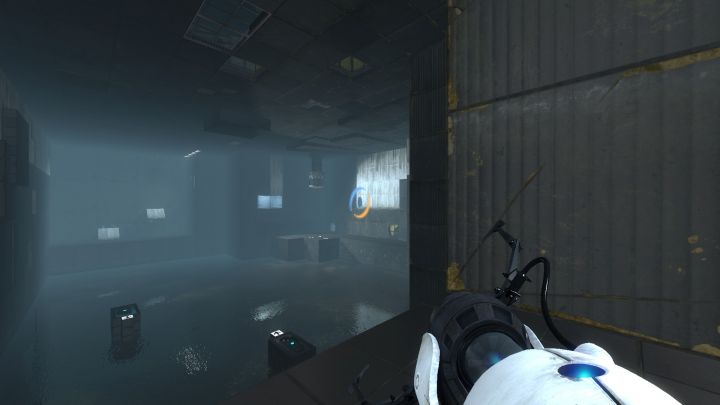
After you hit the button, you are on a timer to position a portal correctly above the floor button across the room, by the last catapult. This timing window isn't super tight, but you should practice this a few times before doing it in a run. Place a portal above the round floor button across from you, and go back to the portalable surface by the button. Go through, and fall down to where the floor button is. From here, re-position your portal to be perpendicular with the ending door (See reference photo), hop back over to where the safety panels come up, and get on the catapult to fling back up to the ending. From here, go to the door, and press up against it.
As with all single player doors, if your character is holding a movement key up against a door when it is triggered to open, it will let you through. With this re-positioning of the portal, you are guaranteed to have the edgeless safety cube from the junk in the dispenser briefly activate the door trigger, and let you through to the end so long as you're holding up against the door.
Challenge Mode Specific
Avoiding Panels
Avoiding the panels on a fast run is important, as a panel between the second and third catapults will fall in front of you. With a right strafe, you can avoid this first falling panel, but ensure that you correct back to the left after to land in the center of the third catapult, so that you can land correctly on the slanted portal surface after the third catapult.
Depending on the speed of your hops at the start, it is possible to be too fast, and to collide with a panel after the third catapult. This could mean one of two things: First, it could mean that you did not strafe far enough back to the left after avoiding the first panel. But second, it could mean that you are slightly too fast to the first catapult, and should slightly slow your hops to the first catapult to accommodate.
Sphere Hop
This route saves roughly 3 seconds over the normal route. Keep this in mind when deciding whether or not to attempt it in Challenge Mode runs. It is assumed that you're using the air strafe route (described in the General Route) with this route, as otherwise you would save more time doing the route normally than switching to this method.
After following the general route up to the button press: Place a portal over by the start of the map (pictured in the gallery below), and go from the portal surface by the button over to the catapult. Place another portal up on the wall to the left of the first catapult's flight path (2nd photo in the gallery). The sphere hop is all about knowing where to look while holding the sphere, and when to let go and jump. Watch videos and demos on the jump to help ease out this learning curve. The Challenge Mode Leaderboards have multiple videos and demos of this route.
You want to grab the sphere as it's coming out of the dropper, and walk onto the catapult at the same time. After you've hit the catapult, you need to adjust your look angle, but first, make sure to hold left strafe the entire time (+moveleft or a by default) so that you can make it over to your portal. You want to be looking at a downward angle, but unlike Catapult Intro, you do not want to be looking straight down, as it's a much more gentle angle. You want to release the sphere roughly at the peak of your height, wait momentarily, then jump and grab in quick succession.
Practice this a lot with a quick save first, and take note of where you're ending up vertically on the wall. This can sometimes be impacted by how far towards the front or back of the catapult you are when you walk on. The lower your portal, the safer, but going straight through it is time-save that you probably want in Challenge Mode.
Once you're through, you want to begin rolling the sphere into the portal, and place the opposite portal to be over the button, so that the sphere can roll through and land on the button. Keep in mind that, as we discussed in the general route, the sphere can sometimes not land correctly when the angle of the portal varies, or in this case, the speed of the sphere. Typically, the faster it's moving, the more likely it is to not drift away from the button, so keep that in mind. It's arguably the trickiest part of the route, as you have to transition from rolling the sphere to getting to the door and pressing against it quickly, just like the general route.
The surface you want to portal over to for the Sphere Hop.

The surface you want to aim at when hopping off the Sphere.


Full Game Specific
Full Game Dialogue
There are no dialogue cues or Elevator Cues for this map.